
Research-based recommendations. We have not personally tested the equipment. No affiliate links are active.
What equipment do you need to start a podcast at home?
For this one- or two-person audio setup, you need one microphone, arm, cable and wired headphones per speaker, plus one shared recorder, recording card and power supply. Use your existing computer to edit, then a podcast host to distribute the finished episode.
This kit is for conversations recorded in the same room. It is designed to grow from one speaker to two without replacing the recording hub. It assumes you already have a desk, chair, suitable computer and internet connection. Cameras, video lights, a new laptop and a treated commercial studio are outside the budget.
Two quality paths, one recording workflow. Choose one alternative per function. Start with one speaker’s equipment, then duplicate only the personal items if a co-host joins.
THE SHOPPING LIST
One function. Two quality paths.
Pick one column for a ready-to-plan setup, or mix individual components using their fit notes. The alternatives are not cumulative purchases. Prices are US references checked October 5, 2026.
| Function | Premium | Best value |
|---|---|---|
| Microphone | Shure SM7B$439.00 / person | RØDE PodMic — XLR, black$86.00 / person |
| Microphone arm | RØDE PSA1+ — black$112.00 / person | Samson MBA38$59.99 / person |
| Recorder & interface | RØDECaster Duo — black$416.00 / setup | Zoom PodTrak P4next$179.99 / setup |
| Headphones | beyerdynamic DT 700 PRO X$279.99 / person | Sony MDR-7506$113.00 / person |
| XLR cable | Hosa HMIC-010 — 10 ft$16.11 / person | Hosa HMIC-010 — 10 ft$16.11 / person |
| Power adapter | Included with recorder | Anker Nano Charger 30W — A2147, US$15.99 / setup |
| USB power / data cable | Included with recorder | Apple 60W USB-C Charge Cable — 1 m, MW493AM/A$19.00 / setup |
| Recording card | SanDisk Extreme 64GB microSDXC — SDSQXH9-064G-GZ6MA$31.99 / setup | SanDisk Extreme 64GB microSDXC — SDSQXH9-064G-GZ6MA$31.99 / setup |
| Audio editor | REAPER$60.00 / license | Audacity$0.00 / license |
| Podcast host | Buzzsprout Audio — annual plan$180.00 / year | Spotify for Creators — hosting$0.00 / year |
¹ REAPER: $60 only if eligible; otherwise $225. Buzzsprout: $180 billed annually, not a $15 monthly commitment. The card’s exact revision is not on Zoom’s published tested list; read its compatibility note before ordering.
Why these choices for a home podcast?
Our value configuration is the starting recommendation for most new shows. The premium path spends more on physical controls, positioning and serviceable components. It is not a claim that every voice will sound better on the more expensive microphone. You can mix the two paths using the compatibility notes below.
If you will always record alone and want the fewest possible parts, a USB microphone can make more sense. We chose an XLR-based system here because the specific brief includes a second local speaker, independent monitoring and recording without relying on a computer.
We considered a USB/XLR microphone such as the Shure MV7+. Its USB features are useful for a different, computer-first setup, but they duplicate capabilities in these recorder-based baskets. We therefore did not include a second interface inside each selected microphone. It remains a comparison reference, not an additional purchase.
An interface without standalone recording can also reduce cost, but it makes the computer part of every recording session. Conversely, buying more recorder inputs than you will use is not inherently premium. Choose expansion according to a real plan for guests, not a vague possibility.
Start with the room you already have
Before ordering, sit where you intend to record and capture a minute on the equipment you already own. Listen for traffic, ventilation, computer fans and long reflections after speech. Move away from the loudest source and try a room with curtains, a rug and upholstered furniture. Keep the microphone near your mouth rather than compensating for distance with more gain.
Acoustic absorption and soundproofing solve different problems. Soft furnishings can help reduce reflections; they will not reliably stop traffic through a window. We have not added a generic pack of foam panels to the basket because the useful placement and amount depend on your room. If the room still dominates the recording after placement changes, address that before buying a more expensive microphone.
WHAT EACH PIECE DOES
The components, with their trade-offs.
Hardware comes first. The editing and hosting options complete the journey from a conversation to a finished episode; they are not substitutes for the equipment.
Shure SM7B
Our premium microphone choice for a fixed, close-miked spoken-word setup. Its supplied windscreens, integrated mounting yoke and switchable response controls make it a practical long-term component. We pair this passive XLR microphone with a recorder that already provides substantial gain.
The trade-offThere is no USB connection, and the price does not guarantee a better result on every voice. A quiet room and consistent technique matter more than the badge.
Fit in the kitShure recommends a preamp with more than 60 dB of gain. The Duo offers up to 76 dB; start without an inline booster. The 764 g microphone is within the PSA1+ load range.
RØDE PodMic — XLR, black
The sensible starting point for this kit: a dynamic microphone with an internal pop filter, internal shock mounting and an adjustable yoke. It covers the core job without charging you for USB electronics that our recorder would duplicate.
The trade-offThe XLR PodMic cannot connect directly to a laptop. At 937 g, it also needs a substantial arm; a lightweight bundled desktop stand is a poor basis for this setup.
Fit in the kitUse one per speaker, connected by XLR to the P4next. Speak into its end, keep your distance consistent and turn slightly off axis if plosives remain audible.
RØDE PSA1+ — black
Our premium arm choice prioritizes positioning: damped springs, cable management and an included clamp let you bring the microphone to a comfortable seated position. The supported 94 g–1.2 kg range covers both microphones in this guide.
The trade-offThe arm needs clearance behind and above the desk. Cable clips do not prevent every desk vibration; avoid moving the arm or tapping the table while speaking.
Fit in the kitCheck the mounting surface before ordering. The retailer specifies a clamp opening up to 2.2 inches; the separate through-desk fitting has different limits. Included thread adaptation accommodates these microphones.
Samson MBA38
A strong value match for a heavy dynamic microphone. Its specified 5 lb capacity and 38-inch reach address the two essentials: holding the PodMic and bringing it close enough without requiring you to lean forward.
The trade-offIt takes more visible space than a compact stand, and its specification does not establish that it is as quiet or as pleasant to reposition as the premium arm. We have not compared their handling in person.
Fit in the kitIts 5/8-inch thread and clamp for desks up to 3 inches thick suit this configuration. Check the desk edge, underside obstruction and the path of the arm before buying.
RØDECaster Duo — black
The premium recording hub earns its place through hands-on controls, two high-gain XLR inputs, separate headphone outputs and multitrack recording. It is one component of this kit: the microphones, arms, headphones and storage still serve separate jobs.
The trade-offTwo XLR inputs suit two local speakers. If three or four local XLR microphones are a firm requirement, choose a recorder with enough inputs before buying; do not plan around unverified adapters.
Fit in the kitUp to 76 dB of input gain supports the SM7B pairing on paper. The supplied power adapter and USB-C cable are included in our budget. Record isolated microphone tracks as well as a reference mix.
Zoom PodTrak P4next
This is our value recording hub because it provides four XLR inputs and four separately controlled headphone outputs while leaving room in the budget for the rest of the kit. It records 24-bit/48 kHz audio and can work without a computer during the session.
The trade-offBuy the P4next, not the older PodTrak P4: their recording specifications differ. A card and suitable power arrangement are additional requirements. Its smaller controls and display trade convenience for price.
Fit in the kitThe specified gain reaches 70 dB. The selected dynamic microphones do not need phantom power. Use a USB supply rated for at least 5 V/2.4 A and 12 W; do not assume any old phone adapter qualifies.
beyerdynamic DT 700 PRO X
The premium case is serviceability as much as listening: detachable cables and replaceable wear parts make these closed headphones a considered choice for repeated sessions. The 48-ohm version avoids selecting a high-impedance studio model by accident.
The trade-offAt about 350 g, they are substantial. Comfort and fit are personal, and paying more does not replace learning what clipping, plosives and background noise sound like.
Fit in the kitUse the supplied 6.35 mm adapter with the Duo. The detachable cable is useful when replacing a damaged lead; we have not performed a comparative listening test.
Sony MDR-7506
A wired, closed-back monitoring option that keeps the value kit focused on recording. Each person gets their own headphone feed so a loose cable, accidental mute or clothing noise can be noticed before the conversation is over.
The trade-offThe coiled cable is fixed rather than conveniently detachable. Its pull and the fit of the ear pads are worth checking during a long seated session.
Fit in the kitUse the 3.5 mm plug directly with the P4next. Keep the included 6.35 mm adapter if you later move to a different recorder. Headphones belong on the recorder while recording, not on a delayed computer playback feed.
Hosa HMIC-010 — 10 ft
Use the same cable in either kit. Its balanced XLR connection and useful desktop length do the job; we see no reason to invent a premium cable tier for spoken-word recording.
The trade-offTen feet is convenient around a desk but should be measured against the actual route. Excess cable should be loosely managed, not pulled tight around the arm.
Fit in the kitBuy the female-to-male XLR HMIC-010 microphone cable. One end goes to the microphone and the other to a recorder input. A USB cable or an XLR-to-jack lead is not the equivalent.
Anker Nano Charger 30W — A2147, US
A compact wall supply for the P4next when you do not already own a suitable one. Its documented 5 V/3 A output exceeds Zoom’s specified 5 V/2.4 A requirement; that output profile matters more than the large wattage on the front of a box.
The trade-offThis is the US plug version. Electrical compatibility is based on published ratings, not a bench test of this pair. The Duo uses its own included supply.
Fit in the kitConnect to the Zoom’s USB-C power input. Keep an adequate existing adapter if you have one, and deduct this item from your basket; there is no need to replace a suitable supply.
Apple 60W USB-C Charge Cable — 1 m, MW493AM/A
One cable serves two stages: power the P4next from the wall adapter while recording, then connect the recorder to a USB-C computer for file transfer after the session. Apple explicitly documents charging and USB 2.0 data support; it is not restricted to Apple computers.
The trade-offThe one-meter length suits a nearby outlet or power strip. This basket assumes a computer with USB-C; if yours has only USB-A, choose a compatible data cable for that port before ordering. For simultaneous wall power and USB recording, add a second suitable data cable.
Fit in the kitAfter safely stopping and powering down, move the cable from the power arrangement to the recorder’s USB data port and your computer, then follow Zoom’s file-transfer mode. Reuse a suitable power-and-data cable if you already own one. The Duo includes its own USB-C cable.
SanDisk Extreme 64GB microSDXC — SDSQXH9-064G-GZ6MA
A single 64 GB microSDXC card is ample for getting a one- or two-person audio show underway. Paying for the largest available capacity adds little to this kit; a second copy after every session is more useful.
The trade-offRØDE lists the Extreme 64 GB family. Zoom’s published tested-card list does not name this newer SDSQXH9 revision. It matches the P4next media format, but this exact pairing remains an informed specification-based selection, not a manufacturer-tested guarantee.
Fit in the kitFormat in the recorder and make a full-length trial recording before an important session. If you require an explicitly listed Zoom model, match its current compatibility list exactly; do not accept an automatically substituted retailer SKU.
REAPER
Our paid editing choice for a repeatable multitrack workflow: save a project, keep each speaker separate and refine the edit without turning the recorder itself into an editing workstation. A reusable session template becomes useful as episodes accumulate.
The trade-offThere is a learning curve. The $60 discounted license applies only when its conditions are met; commercial users above the stated revenue threshold need the $225 license. A 60-day evaluation is not a permanent free license.
Fit in the kitImport the recorder’s isolated WAV tracks onto separate tracks. The discounted commercial-use threshold is $20,000 annual gross revenue; check your own eligibility. Add $165 to our example if you need the commercial license.
Audacity
The free, open-source choice for importing recordings, trimming mistakes, balancing tracks and exporting an episode. It lets you learn the editing decisions before committing money to software.
The trade-offA free tool still needs an editing and backup routine. Save the project as well as the export, and listen to the final file all the way through.
Fit in the kitAvailable for Windows, macOS and Linux. This guide uses recordings imported from the card; it does not assume every operating system supports the same multichannel USB recording setup.
Buzzsprout Audio — annual plan
The paid option for a creator who values its publishing workflow, directory guidance, statistics and included transcription. Hosting stores your finished episodes and provides a feed; it does not replace the equipment or editing stages.
The trade-offThe displayed $15/month is billed annually: $180 upfront, with up to 72 upload hours per year. Stay within that allowance. This is not a promise that hosting on a paid service will bring more listeners.
Fit in the kitBudget one account for the show, not one for each host. A weekly one-hour show fits inside 72 hours annually, but bonus episodes count too. Recheck the current plan and renewal price before subscribing.
Spotify for Creators — hosting
The free hosting route keeps recurring costs down while you establish a publishing habit. It supports hosting and distribution beyond Spotify, so the starting budget does not depend on paying for an audience you have not yet built.
The trade-offHosting for free does not guarantee discovery or monetization. Keep your own copies, and follow the submission requirements of each destination rather than assuming that creating an account publishes everywhere.
Fit in the kitCreate the show and use its RSS feed for other podcast directories where required. Choose one hosting provider for the show; do not buy both hosting options in this list.
How does the complete podcast setup connect?
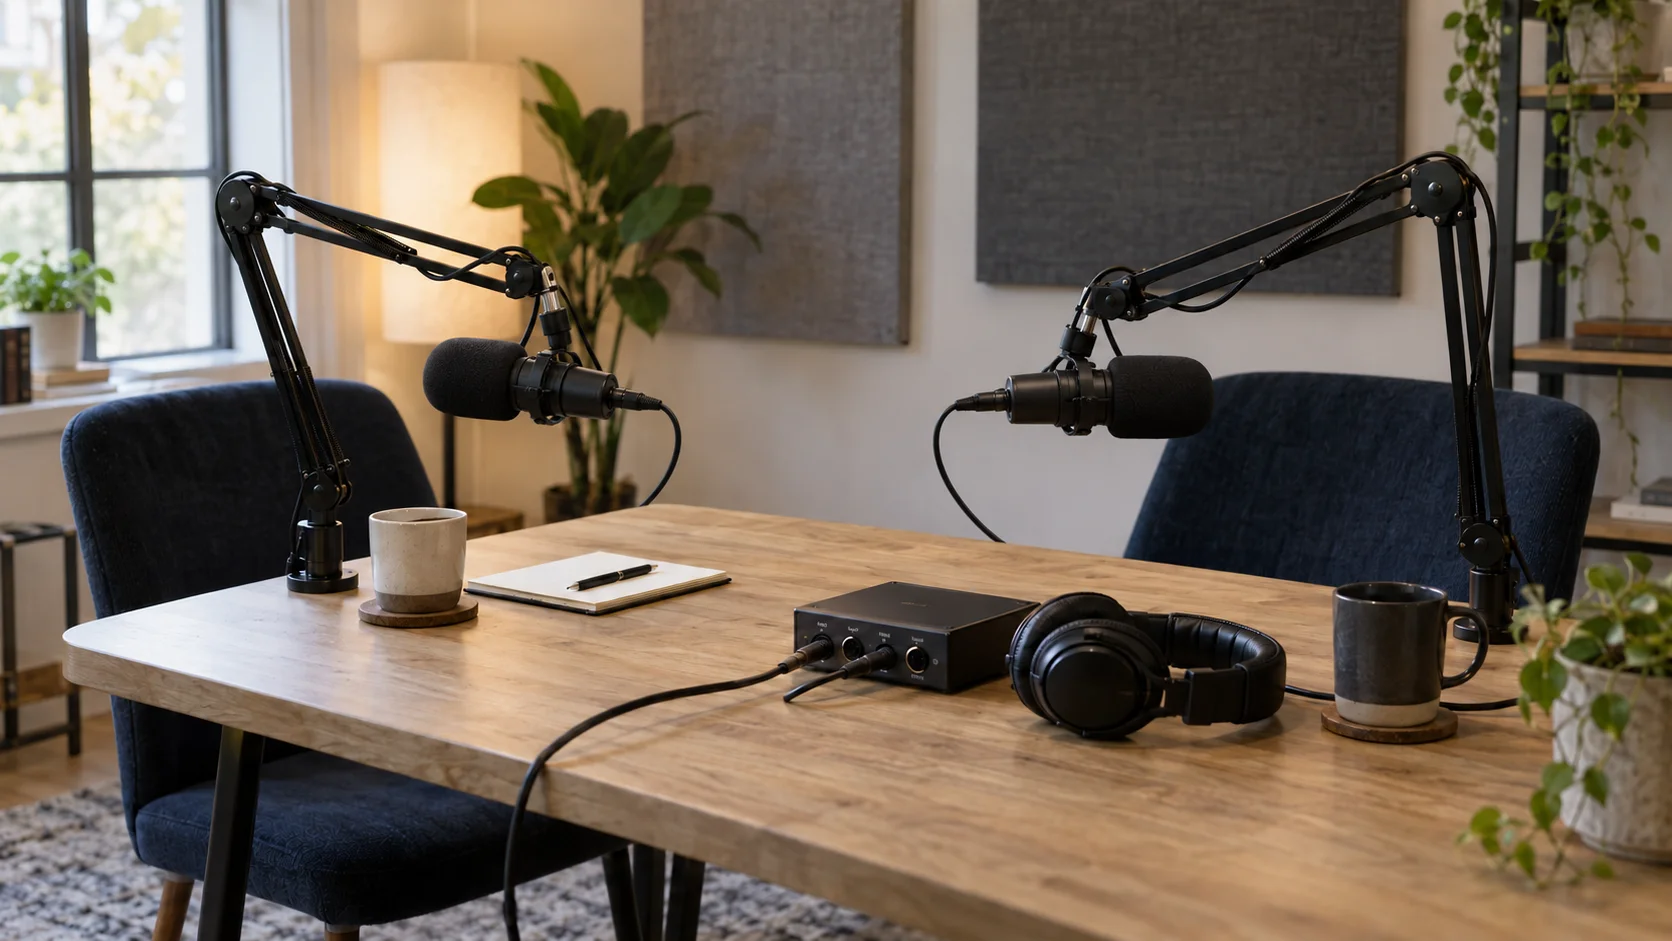
Each voice follows its own path: microphone → XLR cable → recorder input. Each listener connects wired headphones to the recorder. The shared recorder writes the session to a microSD card; afterward, you copy the files to your computer, edit, export and upload to your host.
For two speakers, duplicate the microphone, arm, XLR cable and headphones. Keep one recorder, card and power setup. Do not plug two USB microphones into a laptop and expect this guide’s independent XLR routing to apply.
The premium headphones’ 6.35 mm adapter fits the Duo; the value headphones’ 3.5 mm plug fits the Zoom. Both microphone selections use XLR and can be mixed between the two recorders, subject to a real gain and noise check on the voice being recorded. Cable and arm choices can also be mixed after checking threads, weight and desk clearance.
Your first recording, from setup to saved files
1. Mount the arms on a firm, suitable surface. Route cables with enough slack for normal movement. Position each microphone so the speaker can sit comfortably and speak into its end without turning away during sentences.
2. Insert the card, then format it in the recorder after copying off anything you need. Formatting erases existing files. Connect the recommended power arrangement. Plug microphones into separate inputs and headphones into separate outputs; leave phantom power off for these passive dynamic microphones.
3. Create a short rehearsal using the same microphone distance as the real session. Have each person deliver their loudest likely line. Adjust input gain while watching the meters and leave room for laughter; a practical starting target is speech peaks around −12 dBFS. That is a starting point, not a mandatory target for every voice.
4. Enable individual microphone tracks as well as a reference mix. Begin with restrained processing and check what the recorder actually saves. Aggressive noise reduction, compression or gating can change words and breaths in ways that are hard to reverse.
5. Listen to the rehearsal through headphones. Check for clipping, plosives, desk knocks, electrical noise and one speaker leaking heavily into the other microphone. Adjust placement and gain before adding plugins. Then make a trial recording as long as a normal episode, especially with a new card or power supply.
6. After the session, stop recording and allow the recorder to finish writing. Copy the originals into a dated episode folder, make a second copy on another device or existing cloud storage, and open a few files to verify them. Keep the card intact until both copies are checked.
Use the recorder’s own manual for menu names and firmware-specific options: RØDECaster Duo guide and P4next manual. The sequence above is our proposed workflow, not a report of hands-on testing.
What happens after you press stop?
Import each speaker’s original track into the editor and save a project before making changes. Start with the conversation: remove false starts, long interruptions and accidental repetition where that improves clarity. Keep a natural rhythm rather than deleting every breath or pause.
Balance the speakers, make only the corrective changes the recording needs, then export a listening copy. Check it on headphones and an ordinary speaker at a comfortable level. Keep an uncompressed master as well as the final delivery file. Follow your chosen host’s current file and loudness guidance instead of treating one export preset as universal.
Prepare an accurate title, a concise description, useful links and a corrected transcript. Review names, figures and quotations in any automated transcript. Upload the final file, preview it and follow the host’s directory submission steps. A published feed and an audience are separate achievements.
Create a repeatable folder structure: episode number, originals, project, exports and notes. A backup on the same computer is not protection against losing that computer. Reuse a second drive or cloud space you already have; a new premium SSD is not an essential purchase for this initial audio kit.
PLAN THE SPEND
How much does this podcasting kit cost?
Premium path
$1,295.09one-person hardware
- One complete position per speaker
- One shared recorder and card
- Recorder power and USB cable included
Best value path
$522.07one-person hardware
- One complete position per speaker
- One shared recorder and card
- USB supply and data cable included
USD, new equipment, before tax and shipping. No membership discounts, trade-ins, financing, coupons or affiliate bonuses assumed. Black variants where specified. Existing computer, desk, chair, internet and backup storage are excluded. Each basket includes a recording card; the value basket also includes a new power adapter and USB power-and-data cable.
Essentials versus additions: the hardware figures cover one or two recording positions. The paid editor and hosting below are optional workflow choices: using the listed free alternatives leaves either hardware total unchanged. Room treatment, video equipment and remote-recording services are outside these totals.
| Cost | Premium solo | Premium two | Value solo | Value two |
|---|---|---|---|---|
| Hardware | $1,295.09 | $2,142.19 | $522.07 | $797.17 |
| Editor, eligible license | $60.00 | $60.00 | $0 | $0 |
| Hosting, first year | $180.00 | $180.00 | $0 | $0 |
| First-year total | $1,535.09 | $2,382.19 | $522.07 | $797.17 |
If you need REAPER’s $225 commercial license, add $165 to either premium total. The premium hosting plan is $180/year at the checked rate; the editor is not a monthly subscription. Recheck renewal terms. The value path has no required software or hosting subscription at the current free tiers.
The extra person adds $847.10 in the premium path or $275.10 in the value path: one mic, arm, headset and XLR cable. No second recorder, card, hosting account or editor license has been added.
Reuse savings: remove $15.99 for a suitable existing Zoom power supply and $19.00 for an existing suitable USB power-and-data cable. If you already have a compatible card, deduct $31.99. Do not subtract an item until you have checked its exact compatibility.
Which extras are actually worth adding?
Start with one voice if that is your format. A second microphone, arm, cable and headset are essential for a second local speaker, not a premium upgrade. The recorder, card and power setup stay shared.
Both selected microphones have internal provisions for handling plosives; the premium microphone also comes with an additional larger windscreen. Start with those and a slight angle to the mouth. Add an external filter only if your test recording still needs it. The extra purchase should solve an audible problem.
Keep the value microphones and upgrade only the recording hub if easier physical control would help you run a conversation. Choose a stronger or more convenient arm before a microphone upgrade if poor positioning is the problem. Reuse a suitable cable, headset or power supply whenever it already fills the required role.
Paid software is a separate choice. You can use the listed free editor and host with either hardware path. Consider the paid options for their particular workflow, not because expensive microphones require a subscription.
For remote interviews or video, extend the kit deliberately: check routing, echo prevention, recording consent and the guest’s local audio. A camera, lighting and paid remote-recording platform have not been quietly included in an audio-only budget.
Questions before you buy
Do I need two microphones for a two-person podcast? In these kits, yes: one per person lets you place and adjust each independently. A single shared microphone can capture a conversation, but it does not provide the same control over distance and level.
Do I need a mixer and an audio interface? No extra box is required here. Either selected recorder handles the necessary microphone inputs and headphone monitoring, with USB functionality when you need it. Buy one recording hub, not both.
Does a dynamic microphone remove room noise? No. Close placement and the room still matter. “Dynamic” describes the microphone’s operating principle; it is not a promise that the recording will exclude a fan, traffic or another speaker.
Should I buy a microphone booster? Start without one in these pairings. Both hubs provide substantial gain. Recheck microphone distance, gain and noise on a real recording before adding another powered component.
Can I record without a computer? Both hubs support standalone card recording. The workflow in this guide still uses a computer later for editing and upload; it does not require buying a new one.
Is the premium kit worth it for a first show? Buy it if its specific controls, mounting and serviceability justify the cost to you. If you are still discovering your format, the value path leaves more money for the room, learning and producing episodes.
How we built this kit
We selected these components from manufacturer specifications, manuals and current US retailer listings, then checked the proposed connections and calculated the baskets. This is a research-based buying guide: we have not handled or recorded with these exact configurations. Prices were checked on October 5, 2026 and can change. Independent specialist review has not been completed.
We evaluated the components by their role, documented specifications, connection requirements, upkeep and full-system cost. The premium choices prioritize the intended use without an arbitrary price ceiling; the value choices preserve the necessary functions. We have not claimed a universal best microphone, measured sound-quality advantage or verified every possible market alternative.
These are ordinary manufacturer and retailer links. No affiliate links are active in this draft. Product selection was completed before detailed affiliate-program research.
Manufacturer documentation and checked price destinations are linked with each component. The card note distinguishes supported format from exact-model testing. RØDE’s accessory list establishes what comes with the premium recorder; Zoom’s manual establishes the value recorder’s power requirement.
Read our editorial policy and affiliate disclosure. Found a changed price or specification? Send a correction to contact@iplie.com.