
Research-based recommendations. We have not personally tested the equipment. No affiliate links are active.
What equipment do you need to start 3D printing at home?
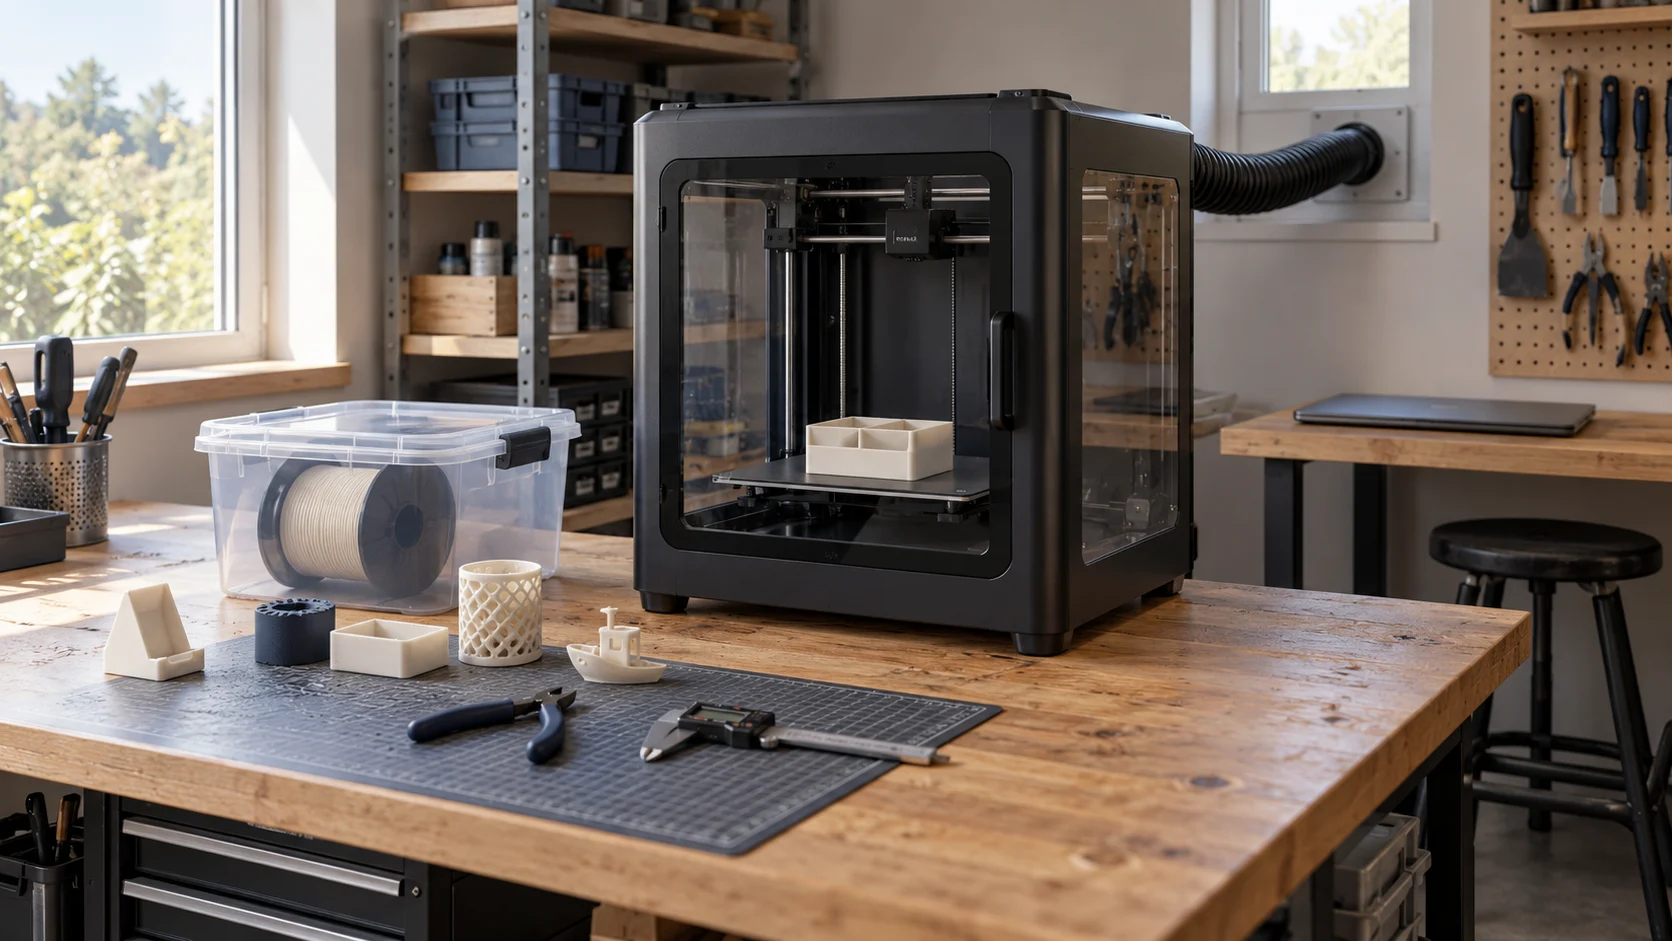
For an adult starting home FDM printing, this kit brings together a printer, PLA filament, storage and useful finishing tools. It is designed for hobby models, organizers and non-critical prototypes—not resin printing or an industrial production line.
Premium: the H2S for finish, capacity and a polished workflow, with traceable filament and premium measurement. Best value: the X2D with capable, more economical supporting equipment. Select one option per function; mix the columns if that suits you.
Essentials first: printer, filament, free slicing software and a prepared workspace. Add as needed: measurement for fitted parts, trimming tools and protective glasses for cleanup, active drying for material that needs it. The equipment table and budgets show the fuller station.
THE SHOPPING LIST
One function. Two quality paths.
Choose one option per row for the fuller station. For the essential first-print setup, start with the printer and PLA, reuse sealed storage, and add free Bambu Studio. US price references checked October 5, 2026; prepared workspace and compatible computer required.
| Function | Premium | Best value |
|---|---|---|
| Printer | Bambu Lab H2S — printer only$1,199.00 | Bambu Lab X2D — printer only$649.00 |
| First 1 kg of PLA | Prusament PLA — Lipstick Red, 1 kg spool$29.99 | Polymaker Panchroma Basic PLA — Black, spool, 1 kg$18.99 |
| Drying / storage | Polymaker PolyDryer — dock + storage box$79.99 | Polymaker PolyDryer Box — storage only$29.99 |
| Measurement | Mitutoyo ABSOLUTE Digimatic 500-196-30$215.63 | Werka digital caliper — 6-inch/150 mm$35.99 |
| Light trimming | Hakko CHP-170 flush cutter$5.47 | Hakko CHP-170 flush cutter$5.47 |
| Eye protection | 3M SecureFit SF401AF — clear, anti-fog$5.08 | 3M SecureFit SF401AF — clear, anti-fog$5.08 |
Both printers include a textured build plate and spool holder. Each path adds a full kilogram of PLA. Both selections are printer-only, with no AMS. The value storage box is not a powered dryer.
THE CURRENT SHORTLIST
Why these choices in October 2026?
We compared current alternatives for print quality, ease of use, maintenance and useful capacity. These are the trade-offs that can change the choice.
H2S versus Prusa CORE One+
Choose the Prusa when repairability and upgrade paths lead your priorities. We favor the H2S here for documented finish, capacity and workflow—not a controlled head-to-head victory. Prusa model and configuration ↗
X2D versus P2S
The P2S costs less. Its positive TechRadar test conflicts with later surface-quality concerns from Thomas Sanladerer; a firmware resolution was not confirmed. The newer X2D takes our value position on the available evidence. P2S first-hand test — TechRadar ↗
Lower-cost and open-frame alternatives
Bambu A2L suits open-frame PLA work; Elegoo Centauri Carbon 2 is a credible budget alternative. Its reviewer found less convenient filament-path servicing. We favor X2D’s overall workflow. Centauri Carbon 2 hands-on review ↗
Different priorities: QIDI Q2 and multi-tool systems
QIDI Q2 performed well with engineering materials. Its optional Box problems do not invalidate the standalone printer. Those priorities warrant a different shortlist. QIDI Q2 hands-on review ↗
Availability is part of the recommendation
The reviewed CORE One+ INDX 8-tool configuration lists shipping on October 15, after this research date. It remains a future option; its results do not describe the base CORE One+. INDX 8-tool review and stated shipping date ↗
Prepare the space before ordering
Use a stable work surface with clearance for the door, plate, spool, waste outlet and controls. Check the working envelopes below, not just the chassis dimensions. You also need a compatible computer and the electrical supply specified for your regional printer.
Plan ventilation or source extraction for the actual room and materials. NIOSH describes particle and chemical emissions from 3D printing: PLA is not emission-free, and an enclosure or internal filter does not certify room air quality. A bedroom or an occupied desk beside a running printer is a poor default. Obtain appropriate advice if the installation is uncertain.
Keep cooling vents clear, follow supervision instructions, and keep children, pets and flammable clutter away from hot or moving parts. A camera cannot intervene in a fault. Workspace assessment, furniture and extraction installation are outside our equipment totals.
WHAT EACH PIECE DOES
The components, with their trade-offs.
Ten references, two alternative paths. Each selection explains what you gain, its main limitation and how it fits the setup.
Bambu Lab H2S — printer only
Our premium pick combines clean, repeatable printing with a generous 340 × 320 × 340 mm build volume. TechRadar’s hands-on review supports its finish and ease of use; Thomas Sanladerer’s later comparison found cleaner overhangs than on his P2S. Choose it for demanding hobby projects and room to grow.
The trade-offA 30 kg machine with proprietary parts. It is not proven better than the X2D on every small PLA print. The optional Vision Encoder is excluded; advertised motion accuracy is not finished-part accuracy.
Fit in the kitPrinter only: no AMS or laser. Use the supplied textured PEI plate and spool holder. The checked US version is 100–120 V; allow the manufacturer’s 700 × 700 × 1,100 mm working envelope.
Bambu Lab X2D — printer only
Our value pick prioritizes good results over the lowest purchase price. TechRadar’s April 2026 test reported consistently clean prints. At $100 above the checked P2S reference, the X2D adds a heated chamber and second nozzle while remaining compact. Begin with one PLA spool on the main nozzle.
The trade-offThe auxiliary Bowden-fed nozzle has different material limitations from the main direct-drive nozzle. This $649 printer-only package excludes AMS; automated multi-material printing is not included in our budget.
Fit in the kitIncludes textured PEI plate and spool holder. Main-nozzle volume: 256 × 256 × 260 mm; dual-nozzle volume is smaller. Checked US model: 100–120 V. Allow 500 × 700 × 850 mm and follow the exhaust-fan instructions.
Prusament PLA — Lipstick Red, 1 kg spool
Pay more for documented consistency: Prusament publishes production data for individual spools, including diameter measurements. That traceability helps when diagnosing a print. Buy the full 1 kg, 1.75 mm standard PLA spool.
The trade-offManufacturer quality-control data do not prove stronger or smoother prints than the current Panchroma Basic. This is standard PLA, not High Speed or a specialty blend.
Fit in the kitUse the external spool holder and validate a suitable third-party PLA profile on a small print. Prusa’s spool tag does not configure a Bambu printer automatically.
Polymaker Panchroma Basic PLA — Black, spool, 1 kg
A straightforward, economical starting material at $18.99/kg. The full spool avoids needing a refill holder. Our choice rests on current material documentation and price; older PolyLite reviews do not establish the performance of this revised Basic formulation.
The trade-offSelect Basic PLA, not matte, silk, glow or fiber-filled filament. PLA is unsuitable for some heat-exposed or safety-critical applications.
Fit in the kitChoose the 1.75 mm, 1 kg full spool. Use an appropriate PLA profile on the main nozzle and inspect a small first print. Suitable in specification for either path.
Polymaker PolyDryer — dock + storage box
Dry a spool and store it in the same detachable box. MyTechFun’s comparison found strong evaporation performance; the modular storage workflow makes this our choice for a one-spool station.
The trade-offThat test used water in a sponge, not moisture inside filament. SUNLU S4 performed better and holds more spools; Elegoo H1 HT offers higher-temperature drying. Different needs can justify either.
Fit in the kitBuy the complete dock-and-box set with the correct plug. Initially dry off-printer, then transfer the spool to the printer holder. Follow the vent and sealing instructions.
Polymaker PolyDryer Box — storage only
A reusable sealed container that can later accept the PolyDryer dock. For fresh PLA, this is the more economical starting point. Reuse a sound sealed bag and desiccant if you already have them.
The trade-offStorage does not actively dry wet filament. We have not independently compared this box’s moisture retention with a bag.
Fit in the kitChoose box only, with no dock. Check spool fit. Replacing it with the complete dryer adds $50; do not buy both for the same spool.
Mitutoyo ABSOLUTE Digimatic 500-196-30
A smooth-running instrument with an absolute scale that remembers position across power cycles. Project Farm’s comparison put its Mitutoyo sample among the strongest overall performers; Starrett led the aggregate score. We favor the Mitutoyo workflow, not a claim that it wins every measurement.
The trade-offExpensive for a hobby kit. The $215.63 reference is DigiKey Marketplace, sold by IndustrialSupplies.com. We have not calibrated or tested this instrument.
Fit in the kitChoose 500-196-30. Use clean jaws and consistent light pressure. An accurate caliper inspects a print; it cannot make the printer equally accurate.
Werka digital caliper — 6-inch/150 mm
Project Farm recommended this as its value choice after comparing sixteen instruments. Its steel construction, measuring modes and sliding feel suit routine hobby checks. The current $35.99 US offer is above the review’s $27 sample price.
The trade-offSample testing does not establish every unit’s accuracy or long-term durability. It lacks the Mitutoyo’s absolute scale; check smooth movement and repeatable readings on arrival.
Fit in the kitChoose the 6-inch/150 mm version, ASIN B0C34PLYND, corresponding to the reviewer’s product link. Check the supplied battery and seller. Reuse a reliable caliper you already own.
Hakko CHP-170 flush cutter
A simple spring-return cutter for filament ends and thin, accessible supports. It serves both paths; we found no direct plastic-cutting comparison establishing a worthwhile advantage for the Knipex alternative.
The trade-offIts rated cutting capacity concerns copper wire, not thick plastic. Do not force or twist it through solid prints or hard wire.
Fit in the kitTrim cooled, removed parts with eye protection and hands clear. Reuse a suitable supplied cutter and subtract this purchase if possible.
3M SecureFit SF401AF — clear, anti-fog
Clear lenses, soft nose contact and flexible temples make this a practical shared cleanup choice. Fit matters more than buying a more expensive variant.
The trade-offNot prescription over-glasses or respiratory protection. If these do not fit securely with your normal eyewear, select compatible protection instead. Check the supplied impact marking.
Fit in the kitThe reference is one pair, not a case. Replace damaged lenses and protect people nearby while removing supports.
Your first print, in six steps
1. Pick a simple model. Start with a flat-based organizer or calibration shape. Check its license, dimensions and intended use.
2. Set up correctly. Follow the manual to remove shipping restraints, run commissioning checks and prepare the cool plate. Select the exact machine, nozzle, plate and PLA profile in Bambu Studio.
3. Inspect the preview. Check scale, orientation and supports. Imported 3MF files may contain another printer’s settings. Begin with the standard quality profile.
4. Observe the start. Inspect first-layer adhesion and stop to diagnose failures. Follow the model’s supervision instructions through Bambu Lab support.
5. Cool and finish. Remove the cooled part as instructed. Use eye protection for trimming. Measure important features; test a small mating section before printing a long fitted part.
6. Save and store. Record the successful profile, put filament away and clear scraps. Change one setting at a time when troubleshooting.
PLAN THE SPEND
What does this 3D printing equipment kit cost?
Premium path
$1,243.99essentials with suitable storage already owned
- Essentials: printer, 1 kg PLA and free slicer
- Fuller station: storage, caliper, cutter and glasses
- Fuller station includes active drying
Best value path
$682.99essentials with suitable storage already owned
- Essentials: printer, 1 kg PLA and free slicer
- Fuller station: storage, caliper, cutter and glasses
- Fuller station uses storage without active drying
| Cost | Premium | Best value |
|---|---|---|
| Printer | $1,199.00 | $649.00 |
| First 1 kg of PLA | $29.99 | $18.99 |
| Drying / storage | $79.99 | $29.99 |
| Measurement | $215.63 | $35.99 |
| Light trimming | $5.47 | $5.47 |
| Eye protection | $5.08 | $5.08 |
| Equipment subtotal | $1,535.16 | $744.52 |
| Small consumables — planning allowance | $15.00 | $15.00 |
| Starting slicer | $0 — Bambu Studio | $0 — Bambu Studio |
| Planned initial spend | $1,550.16 | $759.52 |
Essentials only: printer, 1 kg of PLA and the $15 consumables allowance total $1,243.99 premium or $682.99 value. This assumes suitable sealed storage you already own and a first project requiring no trimming or precision measurement. Add tools and protection when the task needs them.
Excluded: computer, work surface, room assessment and ventilation/extraction installation, taxes, delivery, import charges and electricity. Obtain any missing workspace costs before treating these figures as your complete project budget. The $15 allowance is an estimate for small consumables, not ventilation.
Adjust the fuller station: replacing the value storage box with the complete dryer raises planned spend to $809.52. Using the Werka caliper in the premium path lowers it to $1,370.52. Subtract any suitable tools you already own; verify final supplier totals.
Essentials, useful extras and later upgrades
Already supplied: both selected printer packages include a textured PEI plate and spool holder. Each budget adds a full kilogram of PLA. No AMS, laser or Vision Encoder is included.
Start here: install free Bambu Studio, select the exact printer/nozzle/plate, and use a simple PLA model. Our budget assumes the standard connected workflow and appropriate account/network access. For local-only H2S use, check the USB requirements: a drive is not supplied and is needed for certain LAN/file-transfer operations.
Complete the station: add the caliper for fitted parts and the cutter plus protective glasses for support removal. Store unused filament sealed; add active drying when required. A $15 allowance covers small cleaning and housekeeping supplies, following the plate maker’s instructions.
Expand when useful: extra dry boxes for more spools, specialist files, spare wear parts and additional plates or nozzles. Multicolor systems serve a different need and add material handling and waste. These are future directions, not extra products already researched or priced in this kit.
Where extra spending helps
Prioritize the working environment, then the capability your projects need. The H2S offers more space for larger work; the X2D is sufficient for many smaller PLA projects. Either can use the value caliper, saving $179.64 over the Mitutoyo reference.
A sealed bag may replace a new storage box, but cannot dry damp material. The complete PolyDryer replaces—not supplements—the selected box. Reuse good tools you own. A different premium choice can be justified for engineering polymers, extensive multi-material printing or repairability; this guide targets a first home PLA station.
Common questions before ordering
Can I use third-party filament? Yes, with the correct material specification and profile. Spool diameter alone does not establish compatibility with specialty or high-temperature materials.
Must every item have two choices? Only when the difference is useful. The same cutter and glasses serve both paths; a higher price alone would not improve their role.
Can I start with PETG or print any replacement part? Learn with PLA first. Other materials need their own drying and plate guidance. A successful print does not establish strength, heat resistance or food-contact suitability. Keep initial projects away from safety-critical, electrical, medical or load-bearing uses.
What about running costs? At $18.99/kg, 100 g of selected PLA costs about $1.90, before failed prints, supports, electricity and wear parts. Track actual consumption rather than treating that example as a measured project cost.
Research and sources
Researched October 5, 2026. These are editorial selections based on exact-model documentation, current offers and the linked first-hand tests by other reviewers. We have not tested the assembled kits, measured emissions or calibrated the tools. Our recommendations express the strongest fit for this use among the candidates examined, not a proven universal ranking.
Evidence is stronger for printers and calipers than for every filament or accessory. Manufacturer quality-control claims remain distinct from comparative test results. Current models and newer alternatives were checked; recent release dates do not automatically establish superior quality.
Prices are US planning references. Check the exact regional variant, seller, order unit, shipping and warranty. Product choices are independent of commissions; no affiliate links are active. The cover is an illustration, not a photograph of the selected models. See our editorial policy, browse other kits, or send corrections to contact@iplie.com.